The Beginning
Girls, cars, and then I discovered pinball! From the moment the seed was planted to buy a pinball machine I wanted to do the artwork for one. So I bought a 1980 Space Invaders. It turns out the artwork on that one was already fantastic. So a couple of month's later I found a 1979 Flash by Williams in average condition. After an electrical overhaul I began designing new playfield art.
I really just dived right in without a whole lot off premeditation. I just knew it had to look cool. I gravitate towards anything done by the French comic artists from the 70's. Guys like Moebius, Caza, and Bilal. I collected Heavy Metal Magazine when I was a kid and have tried to emulate their style as best I can. I'm a process technician by trade, so that makes repairing these solid state machines a little easier. And I draw only as a hobby. I wanted to put my personal stamp on something and didn't want to ruin a working pinball with cheesy art. So I took this project pretty seriously.
After scouring the internet for any original scans of the playfield and backglass I began the task of examining what was cool about the original and what was not so cool. As I added in my own elements from sketches I scanned I found some of the background forms worked well for the flow. It was at this point I decided to keep the clouds and lightening elements to some degree. It also helped keep some of the original Flash theme.
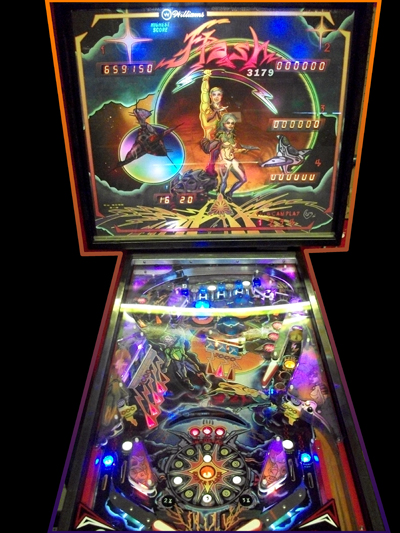
The Machine

Most of the reviews for the original art do not receive high marks. It seems unbalanced, illogical, and busy. I personally hadn't any feelings of nostalgia for this particular machine. As for the game play, it was Steve Ritchie's first production piece for William's and I think it shows. It's fast and it flows well. This model also uses electronic sounds which was a first in 1979, so it was a good fit for my sci-fi theme. I actually used Virtual Pinball software to test drive this one before picking it up for $400.
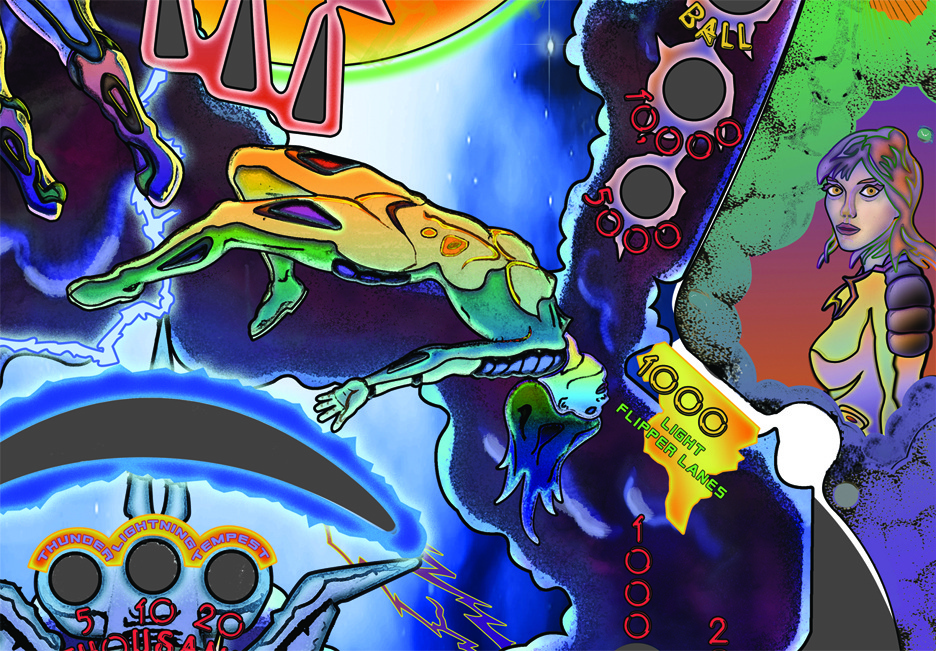
The Playfield Art
So I began, I used large paper and sketched one element at a time and scanned them in. Then in photoshop CS 1, I vectorized every line using the pen and shape tools. This took a long time but the results were awesome. Very clean and at 300 dpi I needed that. I have 8 gigs of ram on my quad processing PC which was essential because of the file size and all the layers I was working with.
The Backglass
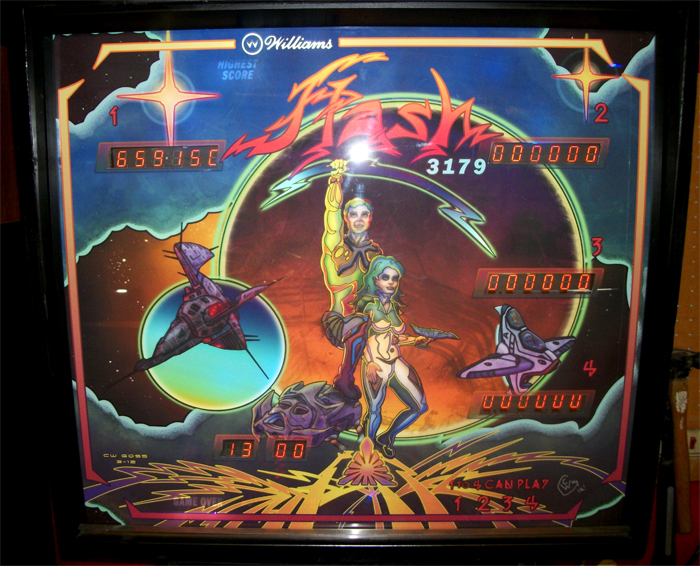
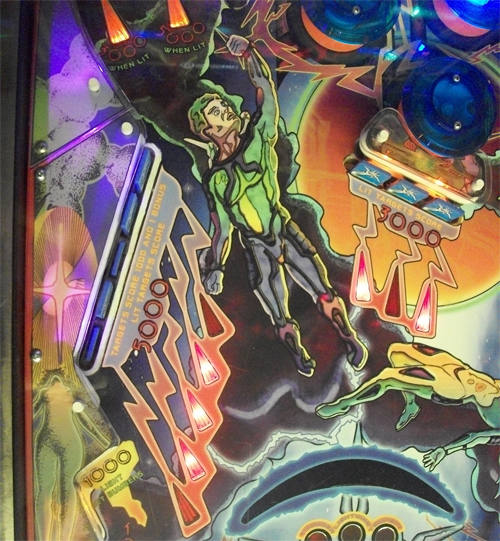
As before, I sketched and scanned. I used a familiar pose for my heros from The Princess of Mars book cover by Frazetta. And I kept the cloud outlines and some of the lightening from the original. Something else I kept was the original font for most of the text. The catch was I had to redraw all of them using the vector pen tool in photoshop.
I decided to produce the backglass first at this point. I decided on translight material for this using a front color layer and a gray mask layer for the back lighting the text, status displays, planet, and heros. It seems to work well after upgrading to bright LED's. Fed Ex (Kinkos) actually did this job for me at $200. This was probally too high in hindsight. Two pieces of plexiglass were used to hold the translights. And lucky for me I had an extra rail for the bottom from the original owner.
I decided to produce the backglass first at this point. I decided on translight material for this using a front color layer and a gray mask layer for the back lighting the text, status displays, planet, and heros. It seems to work well after upgrading to bright LED's. Fed Ex (Kinkos) actually did this job for me at $200. This was probally too high in hindsight. Two pieces of plexiglass were used to hold the translights. And lucky for me I had an extra rail for the bottom from the original owner.

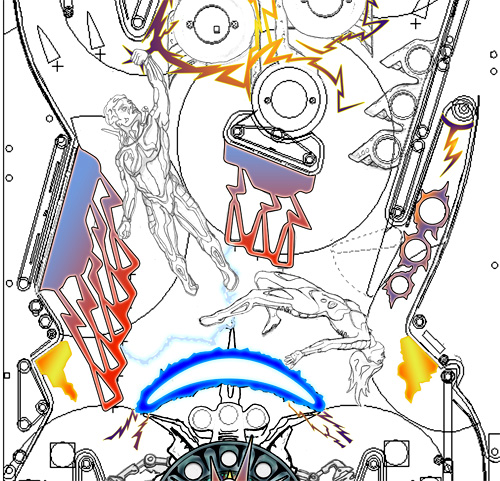
Stripping the Old
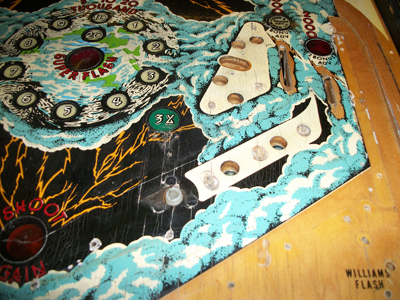
This playfield needed some serious work. It was a good thing I was redoing the art. It had nails holding down the delaminating areas. Several of the lenses were cracked or warped. I popped out all the color lenses, kept the white ones. By the way, those lenses aren't cheap. I found one company actually selling them and they are the fresnal type. They catch the light better but are not original if your restoring your machine. Lesson: don't try to remove the old ones, just sand them along with the rest of the field. They sand nicely. I made a stencil using tracing paper to check all the holes for alignment with the art.
As for the other hardware, I ordered new plastic for the flippers, jet bumpers, and upper guide lanes. Surprisely those were cheap. After sanding up to 800 grit, I clearcoated with water based varnish which I wished I hadn't (more on that later).
As for the other hardware, I ordered new plastic for the flippers, jet bumpers, and upper guide lanes. Surprisely those were cheap. After sanding up to 800 grit, I clearcoated with water based varnish which I wished I hadn't (more on that later).
Whoops!
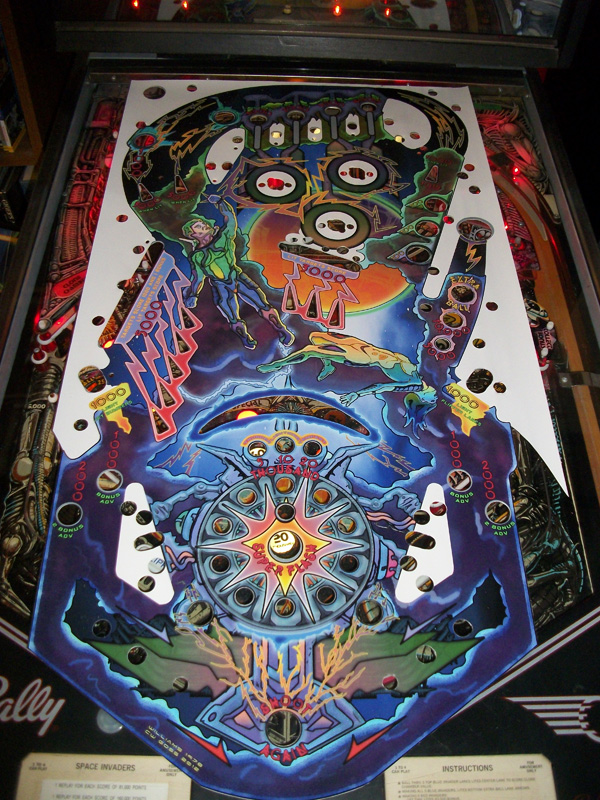
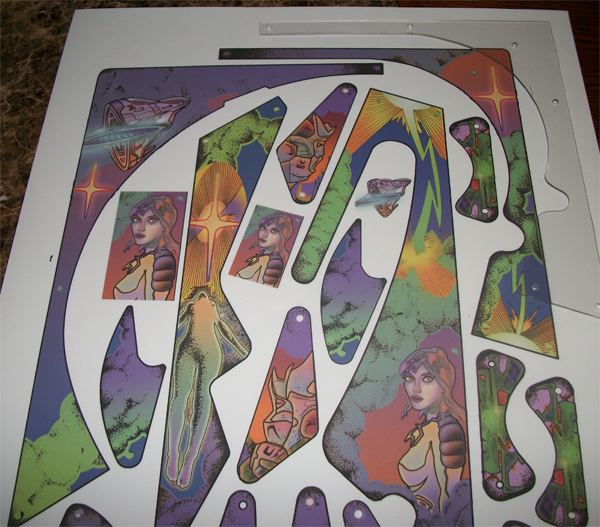
Here' the ready to install first vinyl playfield. It was printed by Kinkos at about 5 mils thick with a thin laminate. The color reproduction was great. $80. I punched out all the holes with gasket punch set (lifesaver) and exacto knife. I knew it was going to be just a hair too thick, therefore I planned to clear coat over it with the water based urethane. As far as alignment I used the stencil made out of tracing paper to check.
Well, the water based urethane and the vinyl didn't get along. The test indicated it was fine. But after a day or so it ate the laminate in some areas. I then tried Mylar (out of desperation) and that only made it worse. On top of that I had begun reassembling the playfield. Tried a few fixes but it was looking worse every time. Arrrrggggghhhh! I pulled it off and goo goned the whole thing. And FYI that stuff goos everything.
Well, the water based urethane and the vinyl didn't get along. The test indicated it was fine. But after a day or so it ate the laminate in some areas. I then tried Mylar (out of desperation) and that only made it worse. On top of that I had begun reassembling the playfield. Tried a few fixes but it was looking worse every time. Arrrrggggghhhh! I pulled it off and goo goned the whole thing. And FYI that stuff goos everything.
Bam!
SO, I decided to retreat and try again. I asked around, tried researching online (no help really), and then a friend of a friend suggested printing on large format car decal vinyl. Like the stuff used to advertise on automobiles. It's called 3M Controltac. I found a printing shop that would
do it for $50! UPDATE: Price went up to $90 in 2015. (There do seem to have better quality control). It was only about 2 mils think. Already had an adhesive layer, gloss laminate, and it applied fairly easy. It even allows the applier to lift back up as you apply it. And even clear coated it, this time with polyurethane. Slower dry time than the waterbased stuff but no reaction with the vinyl. Great product!
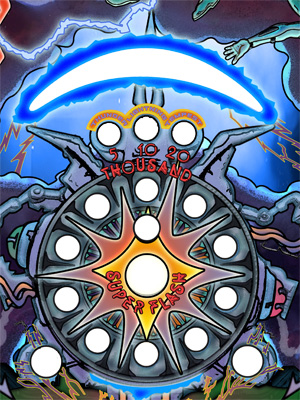
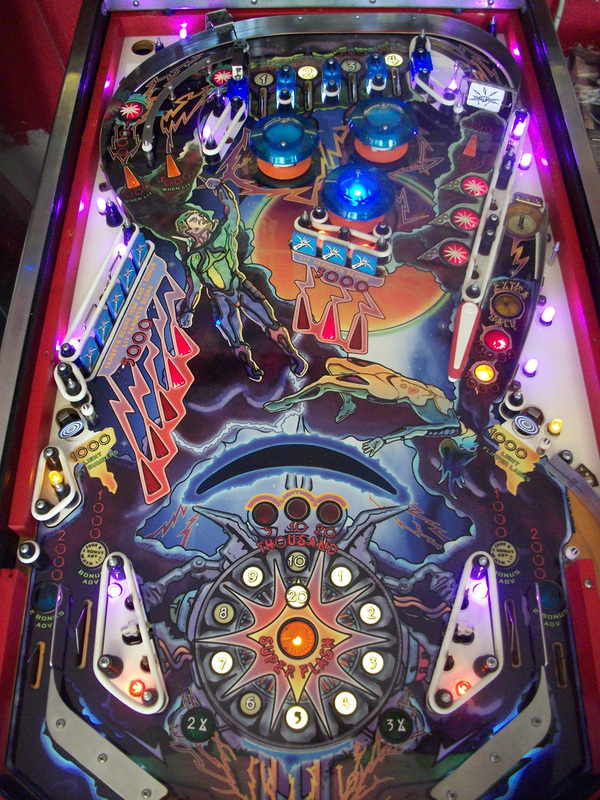
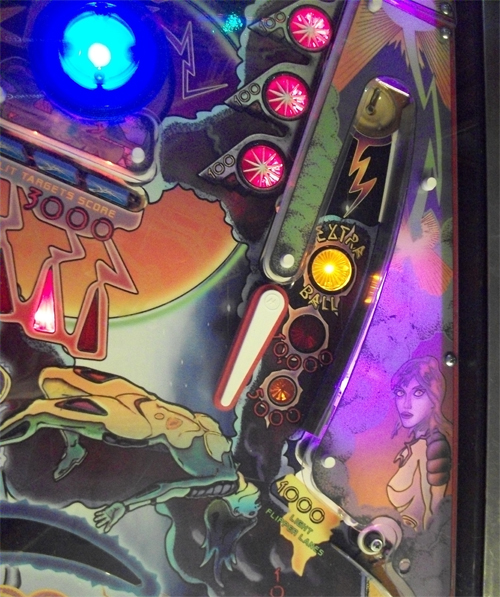
For the re-assembly, the playfield got new rubber, target decals, led's replaced the high power incandescents, and I used a Mylar lense decal set from eBay. In my opinion, the decal set gave me more control over the alignment issues verses printing all on one sheet. Plus no one I talked to could print on clear and give the right amount of color depth. I broke a few things on reassemble, mostly from shifting around the playfield. But hey, this was my first total rebuild.
do it for $50! UPDATE: Price went up to $90 in 2015. (There do seem to have better quality control). It was only about 2 mils think. Already had an adhesive layer, gloss laminate, and it applied fairly easy. It even allows the applier to lift back up as you apply it. And even clear coated it, this time with polyurethane. Slower dry time than the waterbased stuff but no reaction with the vinyl. Great product!
For the re-assembly, the playfield got new rubber, target decals, led's replaced the high power incandescents, and I used a Mylar lense decal set from eBay. In my opinion, the decal set gave me more control over the alignment issues verses printing all on one sheet. Plus no one I talked to could print on clear and give the right amount of color depth. I broke a few things on reassemble, mostly from shifting around the playfield. But hey, this was my first total rebuild.
And Then...
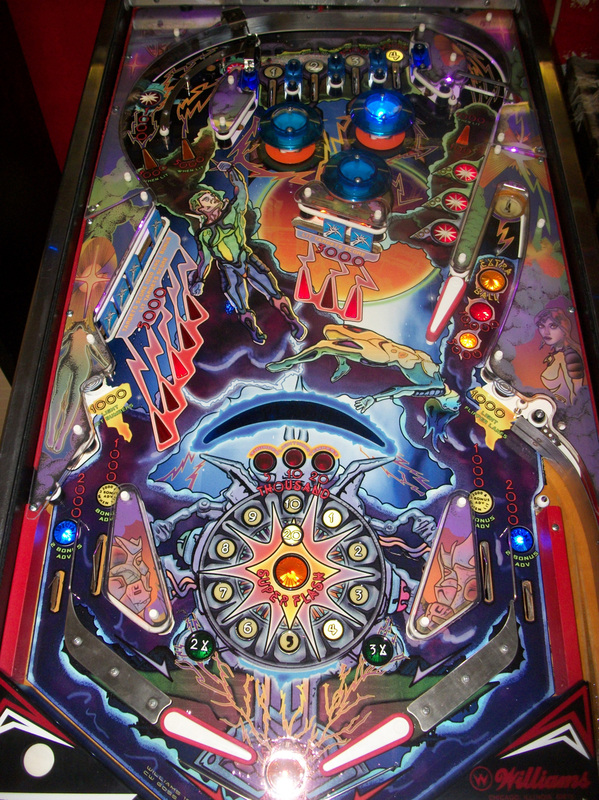
I still had one more major piece of work to do. The plastics. I had to learn how to cut Lexan (I tried plexiglass first but it broke easy). I used a table router ($100) and a grinding stone ($3), along with a dremal tool cutting wheel. After tracing the old pieces on to the new, that worked great. I had the plastic's art printed on translite (this time $50 from the previous local shop) and then cut out with an exacto knife. I attached the art to the backside of the plastic with nothing but packing tape. This was recommended from a source online and worked great. Not messy at all and very hard to see.
Game On!
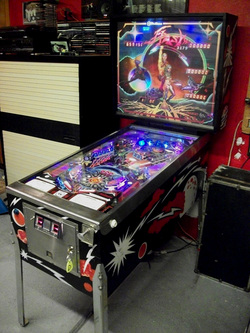
Well I hope you like it. The whole thing took about 4 months. In that time I may have drove the wife and kids a little crazy, but everyone seems to like it. Maybe Gorgar is next! No, it's so ugly it's good! Thanks for reading.
CW Goss
Flash Pinball Art Dept.
[email protected]
CW Goss
Flash Pinball Art Dept.
[email protected]
....so a few years later. The playfield shows no sign of wear. It's been at two different pinball conventions. So I now use this method on any restoration project that needs it. Lessons I have learned are: get the original playfield as smooth as possible. Maybe a coat or two of clear. Next, add more clear coats on top. This material acts much like paint. It does not forgive surface mistakes. For us poor saps that know we cannot fix our pinball playfields with a brush it's something to think about,
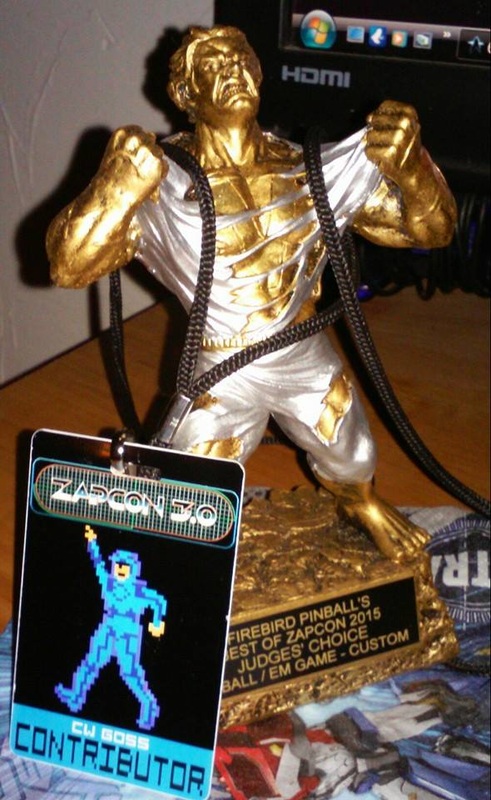
....so a later later. I received the best custom art award at the 2015 Zapcon Convention in Mesa, Arizona. It's 3 years running in The Phoenix, AZ area that brings in some of the best pinball and arcade collectors. A great honor for me. ... I'd like to thank my family for getting me there!
A link for the folks that have helped me. http://www.printingsolutionsaz.com/
